Trust the spacebands....

Below is a scan of a proof of some lines cast this past weekend for a friend. 8pt Linotype Paragon set on 23 pica line, regular justification. I let the space bands do their work, and wanted to learn their tolerances and get used to how a line would space out according to how many spaces bands were used vs. word size, etc. I figured this face could handle some "gappy" word spaces, but I was surprised at how this composition appears fairly consistent. Even though there are some lines with ambitious word spacing, none of them stand out as being too obnoxious with noticeable "holes" or "rivers" in the composition.

What I learned: generally speaking, space bands have a "spread" of 3 pts, so if you have at least 5 space bands in a line, they will easily take up a pica worth of space.  I'll add a separate post which will describe the markings and different thickness of Linotype spacebands.

Another thing I was reminded of after setting these lines are the rules for indentation. For commercial work, the rule of thumb is to indent paragraphs by an em for lines set up to 20 picas. 1.5 ems for lines up to 25 picas, and 2 ems for lines above 25 picas. Of course depending on type size, leading, etc. there are exceptions. But after looking at the paragraphs I set below, I think my 2 em indentations are a bit too aggressive.  I referenced the book "Linotype Keyboard Operation" for the refresher.

Oh, after clicking on this photo to take a closer look, I noticed something else. See the lower case "i" with a problem? I'll have to run the mats out and have a look at them. 

Portland, Oregon Premier of Linotype: The FilmĀ 

Speaking of the American Typecasting Fellowship Conference, here's a conference event that is open to the public. Should be a fun time, and a good way to keep cool tomorrow.

Portland, Oregon Premier of:
Linotype: The Film 

When: Thursday, August 16th
Time: 6pm doors, Meet & Greet | 7:00pm Screening followed by Q&A
Where: McMenamins Kennedy School Theater | 5736 N.E. 33rd Ave. 
Admission cost: $10 (Free to conference attendees)
(advance tickets available at Stumptown Printers or online)

Film Screening, Meet & Greet with Linotype operators and master craft printers from around the country and here at home. Also Q&A with ā€œLinotype: The Filmā€ filmmaker

Plus! After the film, Kyle Durrie will have her "Moveable Type Truck" on site, and will invite folks aboard to print a commemorative Linotype keepsake.

Presented by the C. C. Stern Type Foundry in conjunction with the American Typecasting Fellowship Conference, and is funded in part by the Regional Arts & Culture Council.


Linotype: The Film is a feature-length documentary centered around the Linotype type composing machine. Called the ā€œEighth Wonder of the Worldā€ by Thomas Edison, it revolutionized printing and society. The film tells the charming and emotional story of the people connected to the Linotype and how it impacted the world.

C.C. Stern Type Foundry Located in Portland, Oregon, The C.C. Stern Type Foundry is a working museum dedicated to preserving the art and industry of the cast letterform, letterpress type. With one of the largest collections of Monotype casting matrices in the United States, the C.C. Stern Type Foundry honors the memory of C. Christopher Stern, who built and operated the foundry at Stern & Faye, Printers of Sedro-Woolley, Washington.

2012 American Typecasting Fellowship Conference Since 1978, The American Typecasting Fellowship Conference is a biennial meeting of enthusiasts, amateur and professional, interested in all aspects of the making of metal type used for letterpress printing. This group is central to what is becoming a renaissance of typefounding in America.

Poster Composition cast on the Stumptown Printers' Linotype Model 31

Poster Composition cast on the Stumptown Printers' Linotype Model 31

Ā 

Ā 

Ā 

Mold 10-18 F7660

Couple stupid things I did while casting this evening:

1. Fired up the machine after a long day of regular job printing. (Not the best idea to attempt to cast while not quite on the ball.)

2. Attempted to cast the second position of a 14 pt (regular 2 letter) matrices using a 10-18 F7660 mold.

3. Tried it again.

4. Wondered why the machine was squirting.

Lesson (note to self): Don't do that. First position is no problem but second will not work. Check positioning of mat on mold before attempting to cast. And, do a little research on this particular mold: Mold 10-18 F7660.

Additional thoughts on delivery and elevator transfer cam damage.

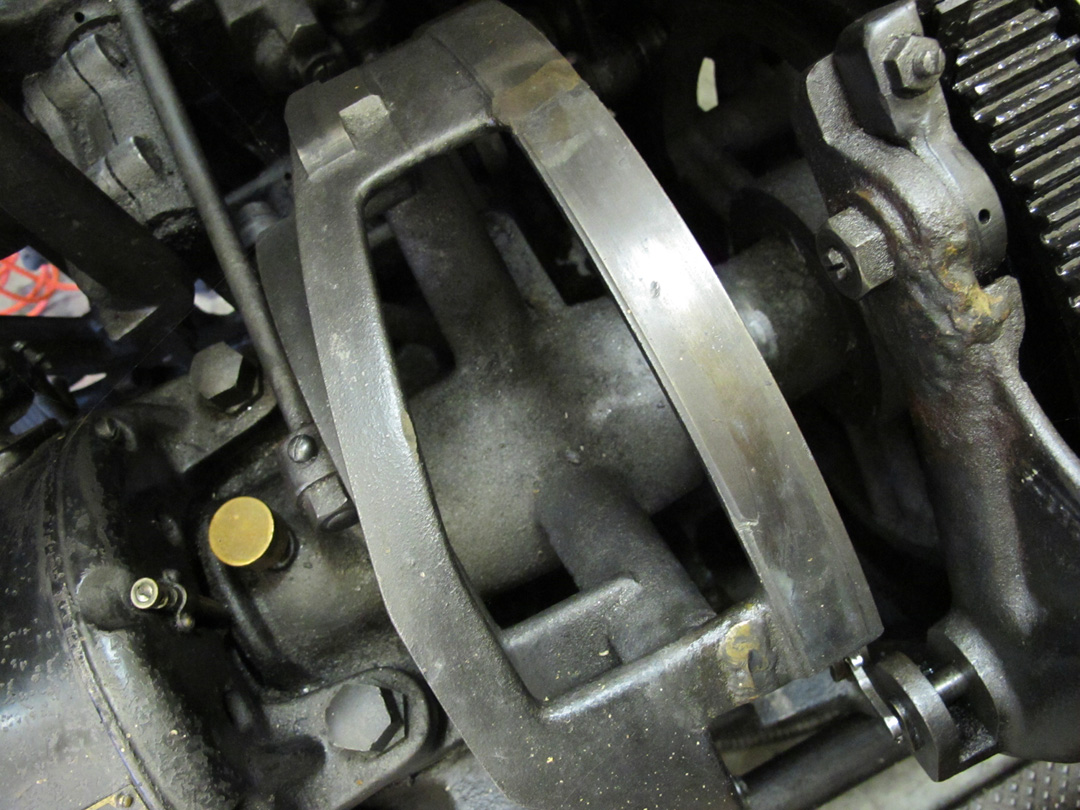
Thinking more on Keelan’s damaged delivery and elevator transfer cam. Bill Spurling pointed out this repair that had been made on his Model 14


I know brazing cast iron can be tricky business, and it seems to be difficult to find folks who are willing to do it these days, but it can be done and in this case it is a clean effective repair. This solution seems to be a heck of a lot simpler than pulling the main cams and shaft apart. Still, the mystery is: how did this thing break? As far as I can see, this part of the cam is used to assist in retracting the ejector lever after the slug is ejected, but it seems that the mold cam lever does most of this work. I can't really imagine what would have caused this much force to crack the cam.

Linotype Machine Cycle View from Back

Embed Block
Enter a valid embed URL or code.

(if above video does not load, try this link)

This is a post for Keelan Lightfoot who recently acquired a Linotype Model 31 with a damaged delivery and elevator transfer cam. His machine is not under power at this point, so he was hoping to see if he could determine if the damage to his machine is detrimental to its operation. Keelan, the 3rd perspective shows a line of white-out that I applied to the cam in order to determine where the follower hits it at this point. I thought it was a good idea, but it didn't really reveal much. The white-out wasn't quite dry when the cam rotated and it appeared to be un-touched after the cycle. Maybe this is good news, but I'm suspicious. I didn't really get a chance to dig around back there. But there you have it. Anyway, this perspective is not one that I see very often. It's quite a graceful motion, isn't it?

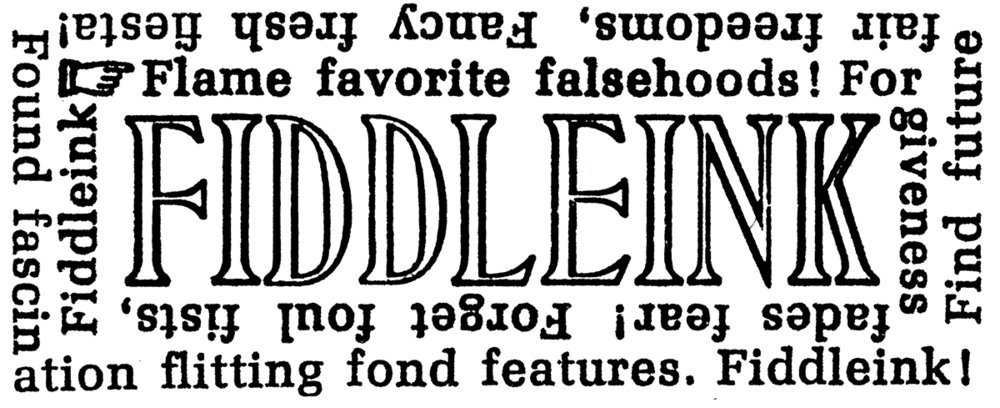
The Linotype Machine that makes the Fiddleink

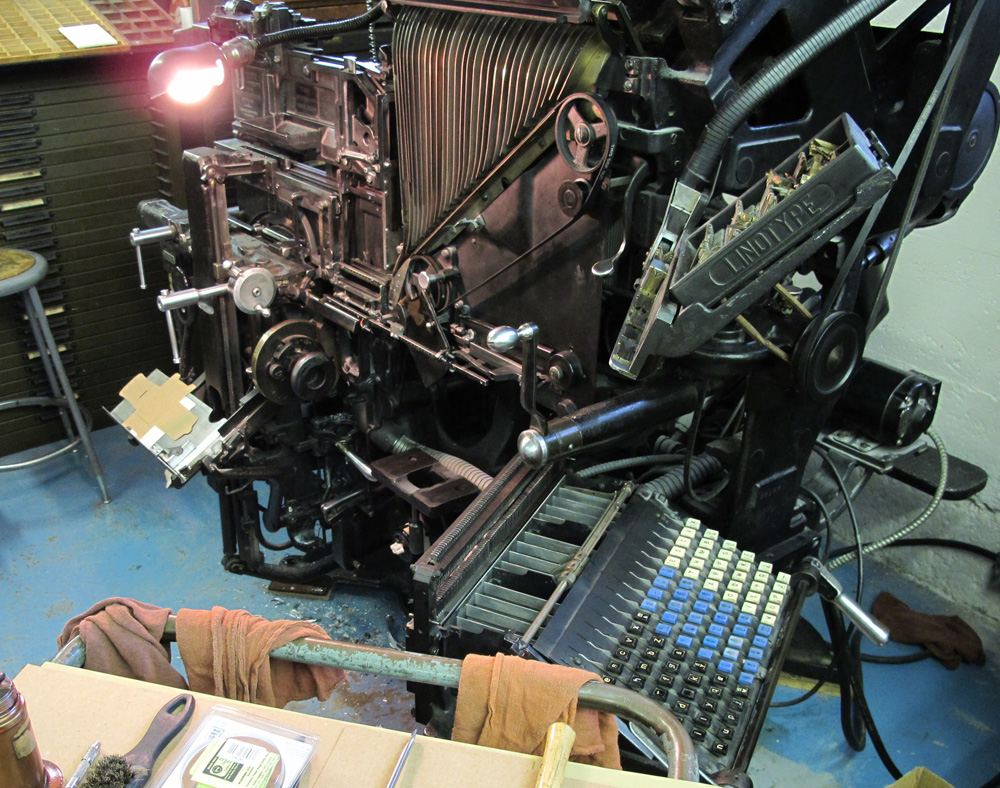
This is my machine, a Linotype Model 31. The photo below is taken at its original location: the former Pioneer Printing Company in Vancouver, Washington. It is now located at my workplace, Stumptown Printers.


Pioneer Printing was the original and only owner until we purchased it, and I do believe that the machine was moved only once over the 64 years that they owned it.

The machine is a single distributor 1946 Linotype 31 ā€œ4 pocketā€ mold with hydraquadder. Serial Number 57557. A friend of ours remembers staring into this plate glass window as a kid, transfixed by the sound of the presses, the scent of ink and the movement of this gentle giant with its slow rolling oversized cams. These memories are what inspired him to pursue a career in printing. He's retired now, and I haven't actually told him that the machine is now on our floor. I wonder if he would be excited to see it again, or if he would want to run for the hills at the sight of it. It’s hard to say.


The folks at Pioneer Printing were able to give me a copy of the original ā€œbill of sale with mortgageā€ issued by the Mergenthaler Linotype Company. The purchase price of this particular machine in 1946 was $6843.00. That’s some serious coin for that time. It's equal to about $75,000 by today’s dollar value. We saved it from the scrap yard for 3 Ben Franklins, a promise to take good care of it and for the cost of rigging. However, considering that the cost of brass is higher these days than it has been for years, and that the metal value alone is often higher than what print nerds like myself can afford to shell out, I feel like the previous owners were generous for allowing us to ā€œsaveā€ the machine instead of simply scrapping the machine.

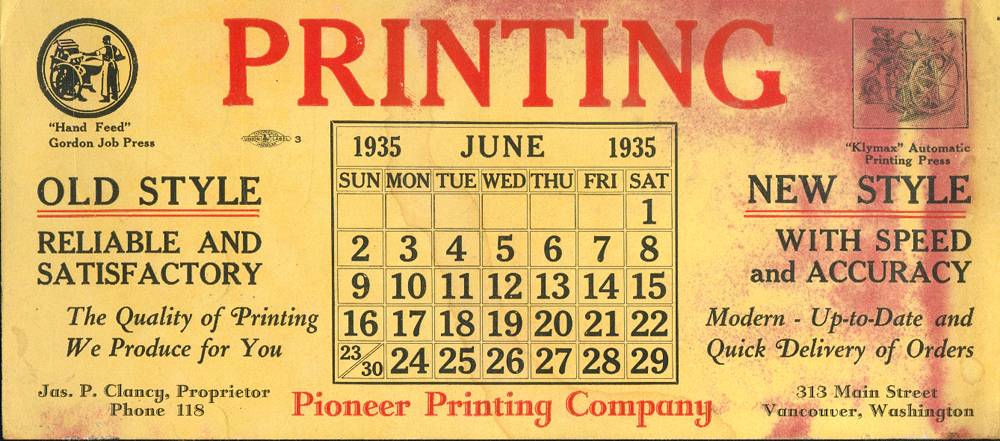
Promotional piece from Pioneer Printing, 11 years before this Linotype was built!

Promotional piece from Pioneer Printing, 11 years before this Linotype was built!

Celebrating the 125th Anniversary

July 3rd, 2011 marked the 125th anniversary of the invention of the Linotype machine. On this day in 1886 the machine was successfully tested after being installed in a production environment at the New York Tribune.

Ā 

To celebrate, some fellow Stumptown Printers and fellow volunteers of the C.C. Stern Type Foundry fired up the 31 with the mission to cast some slugs and have a bit of fun.

Connie from C.C. Stern Type Foundry and Buzzworm Studios casting a ā€œtweetā€

Connie from C.C. Stern Type Foundry and Buzzworm Studios casting a ā€œtweetā€

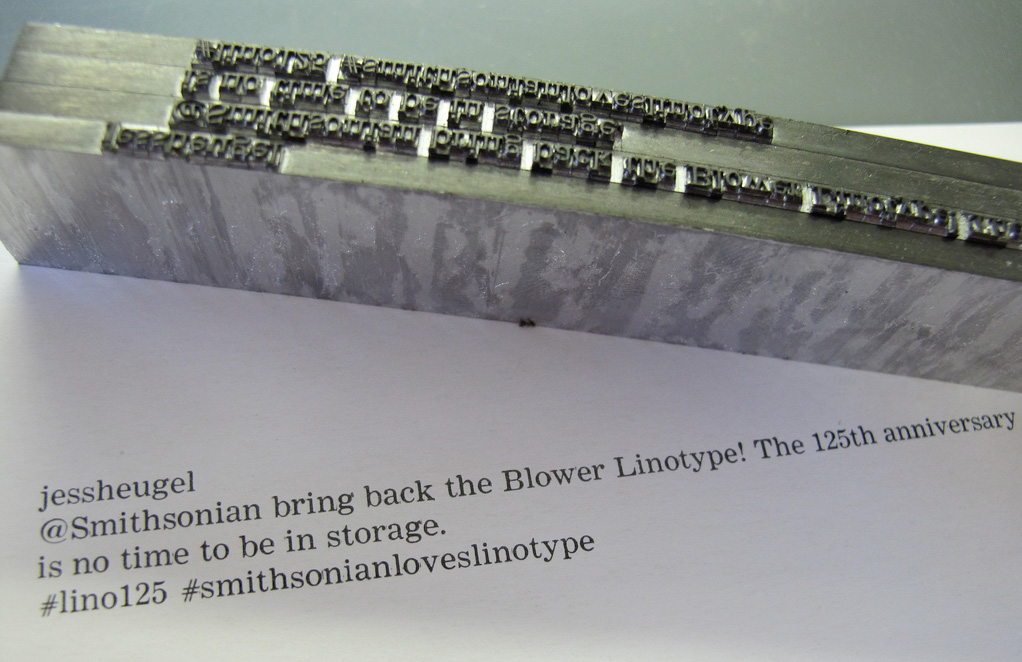
After exchanging tweets with Doug Wilson (director of Linotype the film) earlier that proceeding week, we cobbled together an idea to cast "tweets", and do it in a semi "real time" manner. The idea was that people would tweet Linotype-relevant quotes, ideas, anniversary greetings etc., and use the hash tag #lino125 as a thread to keep the tweets together. We'd cast the tweet in metal, pull a proof of it, photograph the printed proof with corresponding metal slugs and re-tweet with a link to the photo(s). We received a bunch of tweets, too many for us to cast in the small window of time allotted for the project. Several tweets arrived well after the machine was cool and we had started on the beer drinking part of the celebration. Some good anniversary greetings didn't make it to metal this time. There was a lot of enthusiasm for this project, so we'll probably do something like this again. If your tweet didn't make it in this last time, there will be another opportunity.
 

The typeface we used was 8 pt Linotype Paragon (8^464) designed by C.H. Griffith in 1935. This periodical roman was the fourth to be introduced into Linotype's "Legibility Group" and designed to appear clean and crisp in high-speed newspaper production environment that often requires heavy ink coverage on absorbent low quality newsprint. I'm a sucker for this era of linotype periodical faces, to me they represent the poetry of industry, a perfect marriage between the tools and the craft. We were lucky to have the following universal sorts at 8pt that would be required to cast tweets: "@", "#" & "/" , though one of our "#" went missing during the run, it must have found its way into another magazine channel.

tweet from @jessheugel. Way to go, Jess. We agree with this. It would be nice to know that folks could lay their eyeballs on the first Linotype Machine, even if it is only a recent photograph of it. 

tweet from @jessheugel. Way to go, Jess. We agree with this. It would be nice to know that folks could lay their eyeballs on the first Linotype Machine, even if it is only a recent photograph of it. 

To see additional photos of the ā€œtweets to metalā€ project, check out the Stumptown Printers Flickr photo stream. The crew of Linotype the film have offered to send the slugs of 5 tweets to their tweeter. So if you participated, perhaps you'll receive your tweet in metal. Speaking of Linotype the film, we are all excited about their project. The crew have been doing an excellent job capturing footage of today's Linotype operators, experts and enthusiasts and as a result of their research and filming have brought us together to help keep these machines running and this technology alive. So if you aren't familiar with the project, please check it out.

Prost! After the tweet-casting session, we made a toast to Ottmar,  and enjoyed some German lagers. Pictured on the right is Jeff from the C.C. Stern Type Foundry and Buzzworm Studios

Prost! After the tweet-casting session, we made a toast to Ottmar,  and enjoyed some German lagers. Pictured on the right is Jeff from the C.C. Stern Type Foundry and Buzzworm Studios

Wanted: C4 galley

Abra Ancliffe, local letterpress printer and Pacific Northwest College of Art instructor is looking for an Intertype C4 galley for her friends at the Technical Museum of East Iceland in Sedisfjordur, Iceland.

I believe that the machine is in working order, or close to it. Abra is hoping to track down a galley before she visits Iceland next month so that she can deliver it to the museum.

If anyone has a galley that will fit, please let me know. Otherwise, we may be able to dig up another galley in the Portland area. If someone can let me know if galleys for other models are interchangeable with the C4, and/or if a Linotype galley can be easily adapted to fit I’d appreciate the info.

Here are some photos that Abra forwarded of the galley-less Intertype in Iceland:

Ā 

Ā 

Ā 

Replace Keyboard Rubber

Wednesday, March 16, 2011
Replace Keyboard Rubber
Many of the keys had a very slow response, or no response at all which is often due to old glazed & hardened rubber. The idea is that the surface of the hardened rubber doesn't provide enough friction for the cam to rotate, so it wobbles and skids along the surface until it catches. Also, it is not uncommon for the key cams to be over oiled causing oil to drip onto the surface of the rubber roller and breaking it down prematurely. 


Bill Spurling mentioned that he has seen rollers that appear almost as if they have been sliced by the cams. The roller I was mostly concerned about wasn't that bad, but it was glazed quite a bit, and it did have some pretty good grooves worn into the surface. 


As you can see from the photo below, oil also creeps in through the oil points at the ends of the frame. Good thing to remember to not over oil these. 


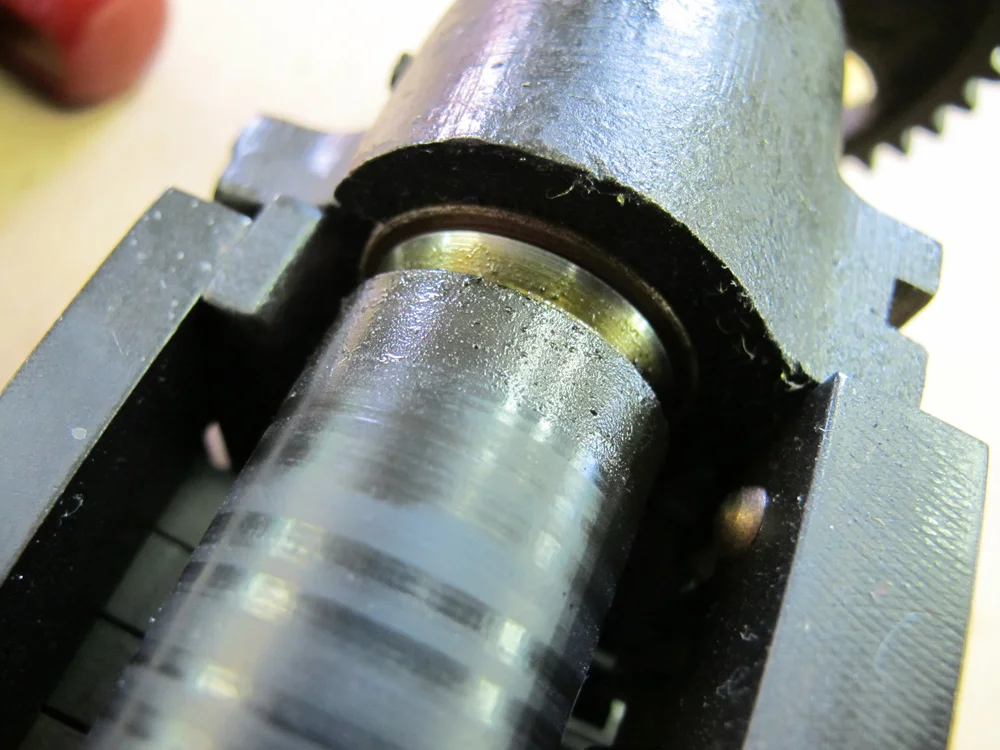
Here you can see that the rubber has broken down and filled the space in between the teeth creating a smooth surface across the cam. 

I've heard that replacing the rubber can be a bit of a challenge. It's pretty tricky to slide the thick walled rubber roll onto the steel core. Apparently there is a tool for this job, and apparently folks like Dave Seat make this process look as easy as the book describes. The book will describe the steps: ā€œslide the rubber on while holding your thumb over the end. This will cause the air inside to be compressed and cause the roll to expand and slip easily upon the shaft.ā€ Really? Sounds like a snap. But, honestly, I knew I was looking at a project. Brian Donnell had also told me that he had spent a lot of time fighting with the keyboard rubber years ago when it was necessary to replace his.

I tried to apply a bit of rubber rejuvenator, a product that we keep around the shop for use when the offset dampening rollers become glazed. It did seem to bring back a bit of life to the rubber. The surface of the rubber roll had a little less sheen. But after studying the caked cam teeth once more, and perhaps because I can be a bit of a glutton for punishment, I decided to replace the rubber. 


No turning back now. Of course the books say: ā€œslip the old rubber offā€ or something like that. There was no slipping. The rubber roll liked the steel core and wasn't planning on going anywhere. The book the mentions: ā€œit may be necessary to slit the rubber length wise to remove it.ā€ Yup.


After removing the old rubber roll, I inspected the core. It was a bit like inspecting the growth rings on a tree stump. I could count at least 5 faint knife score lines produced by the hands of operators and mechanics from the past. A bit humbling. It was kind of cool to be the 6th score line on the core.

Now the fun. Apparently by swiftly whacking this rubber roll on to the core, the seal of one’s palm will be enough to push air through, expanding the almost 1/4 inch thick rubber roll easily into place. I managed to get about 1/16th of the way on. I struggled with this for about 30 minutes. I found a tapered steel ā€œplugā€ to place on the open end, and by pulling and pounding with a mallet, managed to move it on another 1/2 inch. 

I decided to employ a second method: ā€œIf no special tool is available, the roll may be put on easily by starting one end on the shaft and filling the roll with water. Hold the hand over the top and press down allowing the water to escape as the roll goes into placeā€ I tried this method for another 30 minutes with a little more success. The roll was now 1/3 of the way in place. It was a tiring process. My hands were throbbing and I now had water covering the front of my shirt and pants. Picture this: middle aged man rolling around on the floor with a steel rod and rubber roll, red in the face, cursing and grunting, splashing water over himself. What I didn't realize was that our normally quiet after hours industrial warehouse district was in fact swarming with kids going to a neighboring rave. So what I thought was an empty pitch black quiet side street outside our oversized shop windows was actually filled with young party goers who were probably enjoying the spectacle. Ha! Anyway it was around this time when the magical sweet spot happened. Somewhere around the halfway point, the roll gained momentum, and with a sloppy ā€œswackā€ it slid into place. 


My heart sunk a bit when I discovered this. What?!? The roll is too short? Crap! I didn't measure the roll before I spent the last hour and half fighting with it to go on. After a bit of kneading to rubber into place, the roll expanded. Of course! I just spent all of that time putting pressure on it, no wonder it would compress. Whew. 

Here it is, as it should look. Ready to be placed back into the key cam frame.

Here it is, as it should look.
Ready to be placed back into the key cam frame.

Reassembling the frame.

Reassembling the frame.

Completed frame, and tired dude.

Completed frame, and tired dude.


Clean and Oil Key Cams

Sunday, March 13, 2011

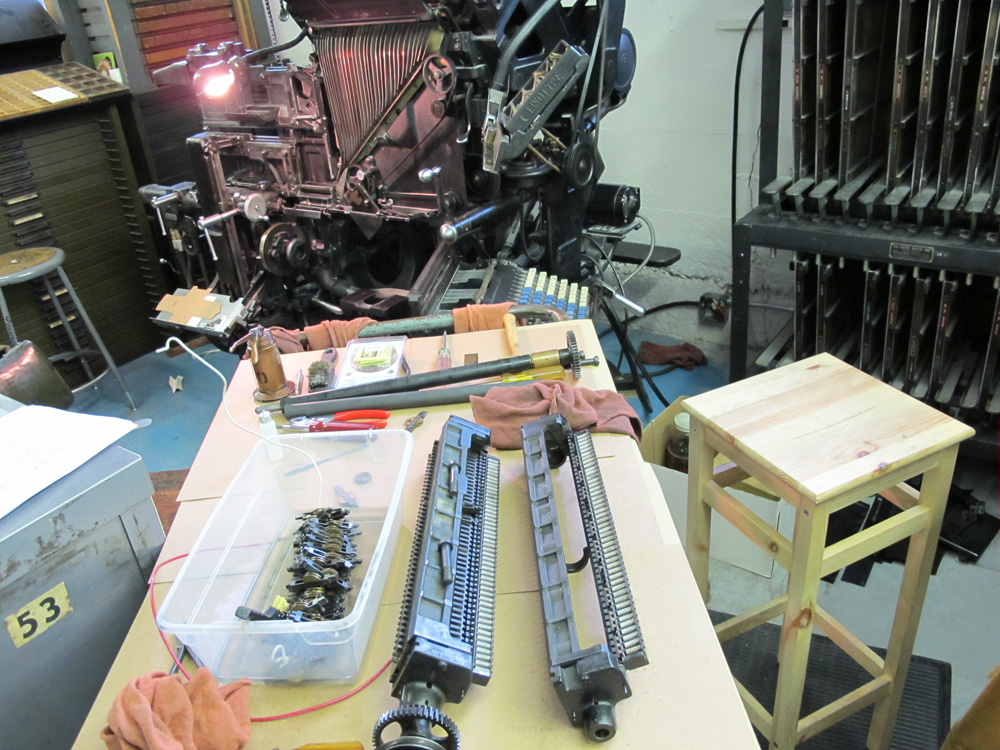
Getting at the keyboard. 1st step: remove the cam yoke frames. They are easy to get to, and cleaning and oiling the key cams is fairly routine maintenance. In fact, the Linotype books will tell to you to clean and oil the cams twice a year.


Here is the keyboard swung open with the front and back cam yoke frames removed. Be careful before swinging the keyboard, make sure there are no key reeds engaged. More on that later.

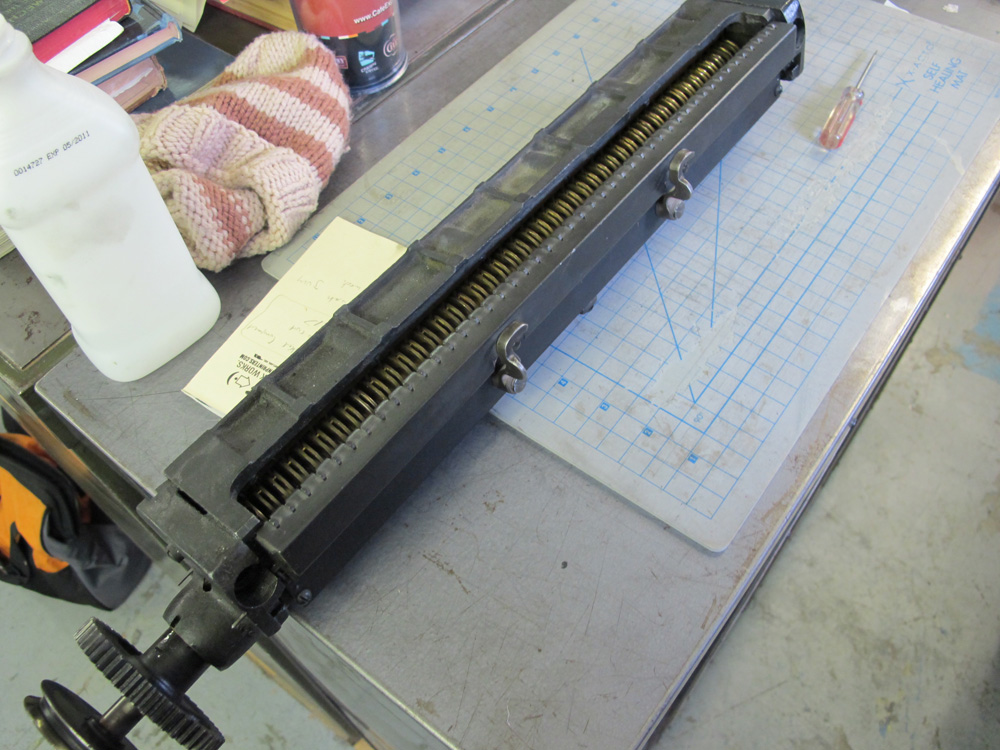
Here's the rear cam yoke frame before cleaning.

Beginning to remove key cams. It's important to keep these cams in order. Due to position and frequency of use, the key cams will wear slightly differently than others. 

Threading Key Cams on Wire.jpg

One tip to cleaning the cams is to thread each one onto a wire. This way they will stay in order, and you can soak all of them at once. Thanks to Bill Spurling for that one. 

KeyCamsSoaking2.jpg

I like this photo. This is the rear set of cams (indicated by different color wire) Looks like some kind of spinal column. Yes, it is the spinal column of language, the printed word, modern civilization...  the backbone of the "art preservative of all other arts..." wooo.  Believe me, after cleaning 90 keys over an open tub of white gas, you'll be allowing your mind to flutter off to these fun thoughts as well.

Pictured in the foreground are both cam yoke frames. The cams for the front frame are soaking in white gas. The rubber roller has been removed. At this point I'm debating on replacing the rubber. More on that later, too.

While the keys are soaking and your head is off in la la land, the frames themselves can be cleaned. Here's evidence off gummed up and slow responding triggers.

Testing to see that the triggers move freely. Once this is done, this is when it is necessary to "lock" the triggers into place by inserting a 1/16" wire the length of the frame as the books will describe.

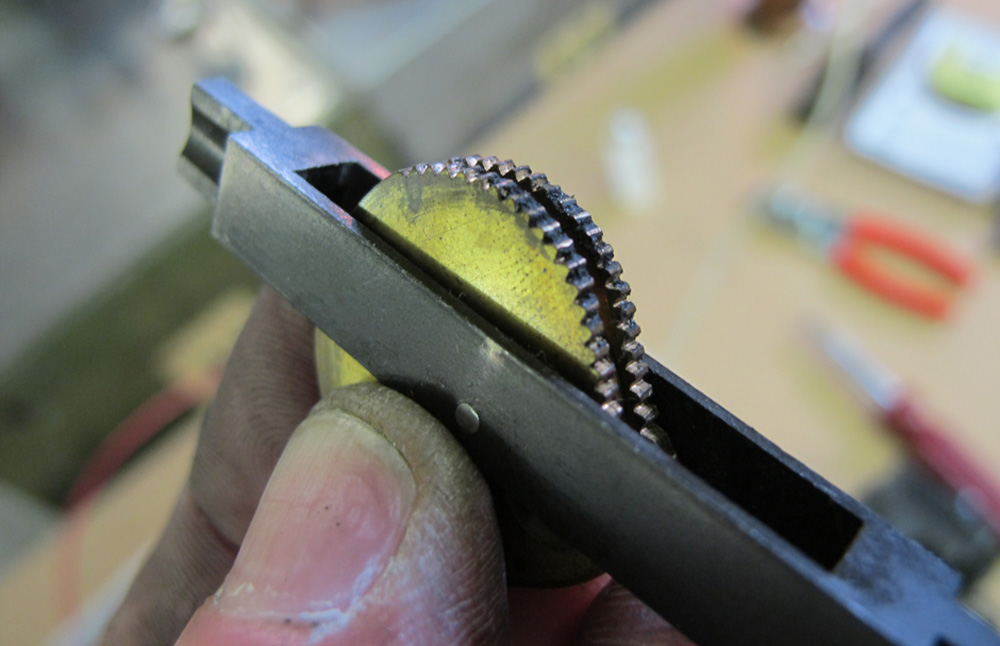
Oooh, look at the teeth on this cam. Problems. This is a good example of why these need to be cleaned. Unfortunately, I didn't count the position of this cam to see if my notes confirmed that this cam corresponded with a key that showed slow response or no response, but you can bet that would be the case. The rubber may have broken down in this position due to oil on the roller. These cams need to be oiled, but only the slightest amount. Clock oil won't gum, but it does run. It's amazing that the tiniest drop will spread a good amount after working the cam a bit. After reinstalling the cams, I let the frames sit over night before returning them to the keyboard so I could remove any remaining extra oil that may have dripped onto the rubber.

Cams clean and scrubbed with brass wire hand brush. Waiting in order to be oiled. 

Whoops. A bit too much oil here. My standard procedure was to spin the cam for 20 to 30 seconds until it spins freely. This is something that I got a feel for fairly quickly. Also, each cam really did seem to have slightly different action and feel. Very subtle, but it was noticeable. Often it was the sound of the cam spinning that gave the cam individual feel. Imagine the difference in sound of a june bug vs. a small dragonfly flying past your ear. Something like that. Woo. Maybe the white gas talking again, but it was interesting. The different feel of the cams was due in part to wear, but also it was evidence that this thing was built by a human. Pretty cool. 

12fileKeyCam.jpg


After the cam is cleaned & oiled, the teeth can be dressed if need be. For the most part, this didn't seem to be necessary. I did attempt to file a couple, but didn't have the correct tool. I tried to use a tiny file used for cleaning automotive ignition points, but it was still a bit too thick. One swipe made a mess of the teeth, so I decided not to butcher any addition ones.

I read that most keyboards contained a space band key cam that was slightly larger than the rest. When I pulled the cams from the frame, I hadn't noticed. After cleaning and oiling 90 cams, it stood out. It's a bit like spotting the queen bee in a full hive of worker bees. Well, kind of. But I think this is easier. I still can't spot that queen bee. Anyway, the space band cam is on the left.

I like this photo, too. Here the cam is resting on the trigger, ready to drop onto the rubber roller (which is still removed allowing for the photo to be taken from this perspective)

Here are the cleaned and oiled cams back in place.