Wednesday, March 16, 2011
Replace Keyboard Rubber
Many of the keys had a very slow response, or no response at all which is often due to old glazed & hardened rubber. The idea is that the surface of the hardened rubber doesn't provide enough friction for the cam to rotate, so it wobbles and skids along the surface until it catches. Also, it is not uncommon for the key cams to be over oiled causing oil to drip onto the surface of the rubber roller and breaking it down prematurely.

Bill Spurling mentioned that he has seen rollers that appear almost as if they have been sliced by the cams. The roller I was mostly concerned about wasn't that bad, but it was glazed quite a bit, and it did have some pretty good grooves worn into the surface.

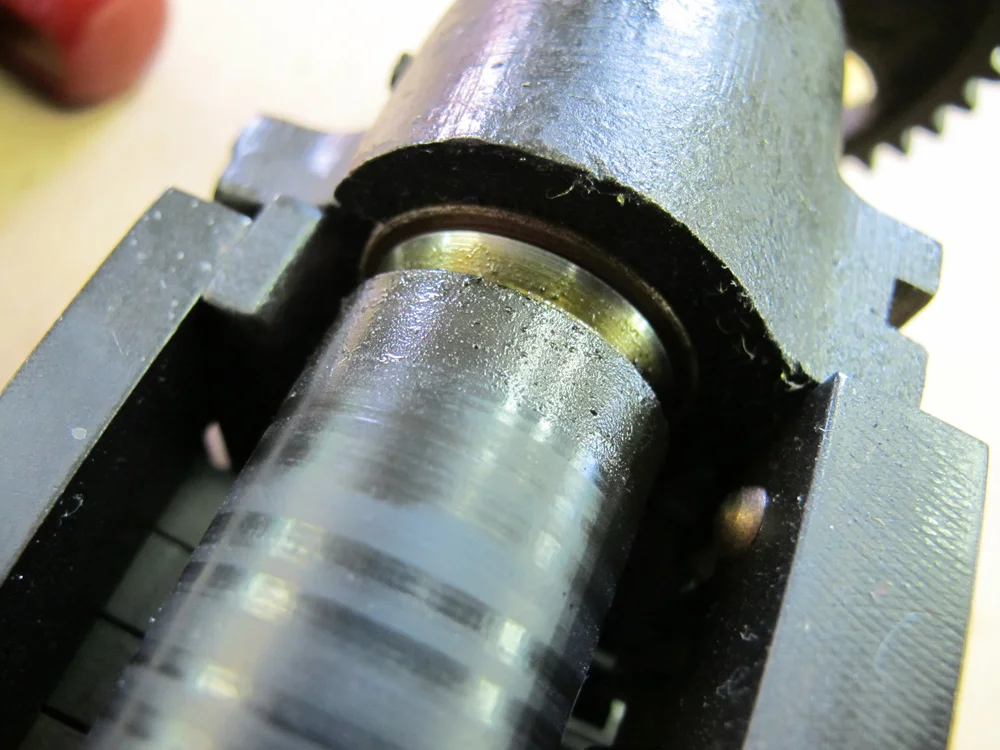
As you can see from the photo below, oil also creeps in through the oil points at the ends of the frame. Good thing to remember to not over oil these.
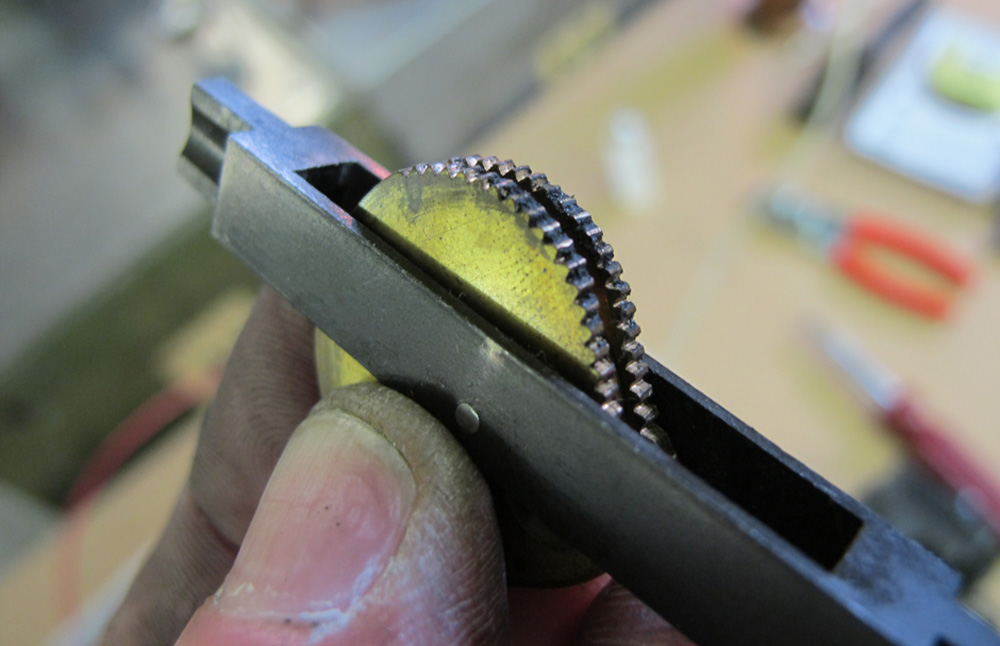
Here you can see that the rubber has broken down and filled the space in between the teeth creating a smooth surface across the cam.
I've heard that replacing the rubber can be a bit of a challenge. It's pretty tricky to slide the thick walled rubber roll onto the steel core. Apparently there is a tool for this job, and apparently folks like Dave Seat make this process look as easy as the book describes. The book will describe the steps: “slide the rubber on while holding your thumb over the end. This will cause the air inside to be compressed and cause the roll to expand and slip easily upon the shaft.” Really? Sounds like a snap. But, honestly, I knew I was looking at a project. Brian Donnell had also told me that he had spent a lot of time fighting with the keyboard rubber years ago when it was necessary to replace his.
I tried to apply a bit of rubber rejuvenator, a product that we keep around the shop for use when the offset dampening rollers become glazed. It did seem to bring back a bit of life to the rubber. The surface of the rubber roll had a little less sheen. But after studying the caked cam teeth once more, and perhaps because I can be a bit of a glutton for punishment, I decided to replace the rubber.

No turning back now. Of course the books say: “slip the old rubber off” or something like that. There was no slipping. The rubber roll liked the steel core and wasn't planning on going anywhere. The book the mentions: “it may be necessary to slit the rubber length wise to remove it.” Yup.

After removing the old rubber roll, I inspected the core. It was a bit like inspecting the growth rings on a tree stump. I could count at least 5 faint knife score lines produced by the hands of operators and mechanics from the past. A bit humbling. It was kind of cool to be the 6th score line on the core.

Now the fun. Apparently by swiftly whacking this rubber roll on to the core, the seal of one’s palm will be enough to push air through, expanding the almost 1/4 inch thick rubber roll easily into place. I managed to get about 1/16th of the way on. I struggled with this for about 30 minutes. I found a tapered steel “plug” to place on the open end, and by pulling and pounding with a mallet, managed to move it on another 1/2 inch.

I decided to employ a second method: “If no special tool is available, the roll may be put on easily by starting one end on the shaft and filling the roll with water. Hold the hand over the top and press down allowing the water to escape as the roll goes into place” I tried this method for another 30 minutes with a little more success. The roll was now 1/3 of the way in place. It was a tiring process. My hands were throbbing and I now had water covering the front of my shirt and pants. Picture this: middle aged man rolling around on the floor with a steel rod and rubber roll, red in the face, cursing and grunting, splashing water over himself. What I didn't realize was that our normally quiet after hours industrial warehouse district was in fact swarming with kids going to a neighboring rave. So what I thought was an empty pitch black quiet side street outside our oversized shop windows was actually filled with young party goers who were probably enjoying the spectacle. Ha! Anyway it was around this time when the magical sweet spot happened. Somewhere around the halfway point, the roll gained momentum, and with a sloppy “swack” it slid into place.

My heart sunk a bit when I discovered this. What?!? The roll is too short? Crap! I didn't measure the roll before I spent the last hour and half fighting with it to go on. After a bit of kneading to rubber into place, the roll expanded. Of course! I just spent all of that time putting pressure on it, no wonder it would compress. Whew.

Here it is, as it should look.
Ready to be placed back into the key cam frame.

Reassembling the frame.

Completed frame, and tired dude.